Spring Chores – Second Steps
Now comes the fun part. If you are like me you have already bought new plants for the coming season that you have been protecting and nurturing until the time is right.
#1 Planting Nursery Perennials
Time to get your new plants in the ground.
- Dig a hole a few inches wider and deeper than the plant. If your garden beds are new this might be more difficult than it sounds. You may need to dig as deeply as you can, add water and let it soak in. Dig again and repeat until your hole is large and deep enough.
- Add water and let it soak in
- Add a few handfuls of compost. Be generous! It is cheap and your plant will thank you.
- Add more water
- Remove the plant from the pot. Often this too is not as easy as it sounds. Many plants are root bound and do not want to come out of their pots. Cut off any roots that are protruding from the bottom of the pot. Lay the pot on its side and gently push on it, rolling it back and forth and pushing until it is loose. Always hold the plant at the base of the foliage, tip the pot and allow the plant to slide out into your hand. If it is resistant roll and push some more.
- Take a look at the roots of the plant. If they are massed or wound together your plant will never take. Loosen and spread the roots by gently working your finger into the bottom and spreading the roots until they fan out.
- Make sure you plant at the right depth. The top of your soil should be the same level it was in the nursery pot. Sometimes you can’t dig deeply enough into your bed. If that is because you have hit rock you can spread the roots and they will grow around it. If it is because the soil is too hard – water, amend with compost, water – or find a new spot.
- Fill around your plant blending old soil and compost.
- Water
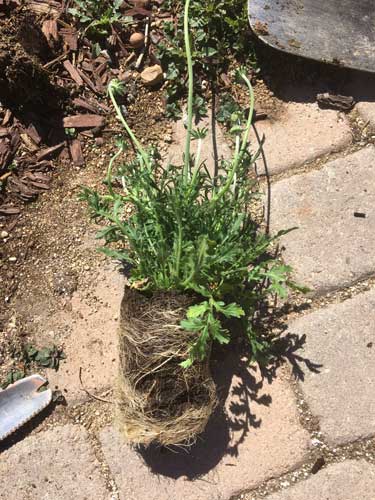
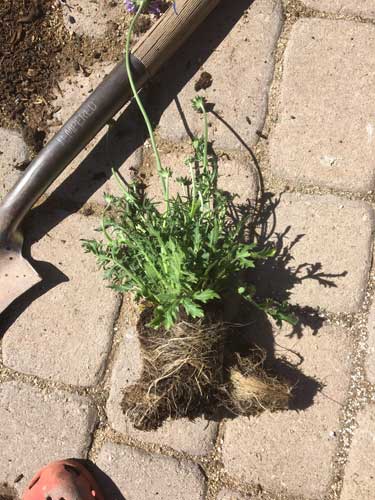
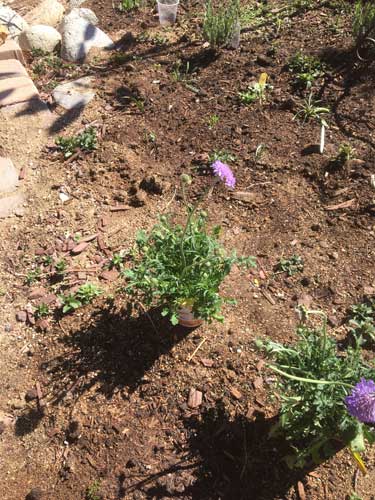
I like to leave the nursery plant tags stuck into the ground by the plant until it is well established. This helps me see at a glance what is new and sometimes even remember what the heck I put in!
If you are keeping a garden journal add your entry.
#2 Bulbs, Corms and Bare Root Planting
It is also time to plant any spring bulbs and corms that you have. Those that would be worthwhile in the high desert garden include Liatris, Dahlias and Daylillies. Follow instructions provided for planting and again add compost in the process. I like to mark where these have been planted otherwise I will lose track and never find them again until I either accidentally dig them up or they break the surface of the soil. I use wooden skewers and sometimes even spray paint the top with the color of whatever I have planted to help with balancing color in the bed.
While I love caladium and ranunculus among other delicate flowering bulbs it is best to save those for pots on your patio.
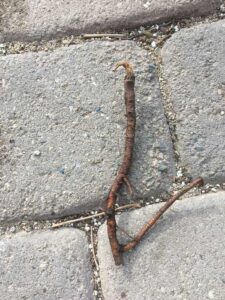 Perennials can also be purchased bare root. They arrive in a plastic bag with a small amount of soil. Many varieties are available bare root including Echinacea, Sea Holly, Veronica and Butterfly Weed. The cost of bare root is far less than nursery pots so they can be a real savings.
Make sure to unpack and put them in water as soon as received. Keep them in a shaded spot and get them planted as quickly as possible. If they do not come trimmed – cut them back to give them a fighting chance.

#3. Seeds
There are many annuals that can add color and texture to your beds and are so easy to grow from seed that they should not be overlooked. Among my favorites are french marigold, bachelor buttons, alyssum, stock, zinnias and cosmos. Not only do they grow quickly from seed but you can then harvest those seeds yourself for subsequent seasons.
The main problem I have with sowing seed directly in garden beds is birds. They love to feast on seeds! I have tried various protective measures including netting, screen and plastic snakes with no luck. After lots of trial and error I have implemented the plastic cup method.
Break up the soil where you will sow seed, water lightly, drop in several seeds and cover to the depth provided in the instructions. Then take a clear plastic drinking cup and cut off the bottom. Nestle the bottom edge of the cup down into the soil around the seeds. Make sure it is securely into the soil so that the wind will not blow it off. With the top open for water your seeds will beginning sprouting in no time and be protected from the birds. Once the plant gets large enough you can remove the cups and save them for next year. If you choose to you can also use skewers to mark their color and location.
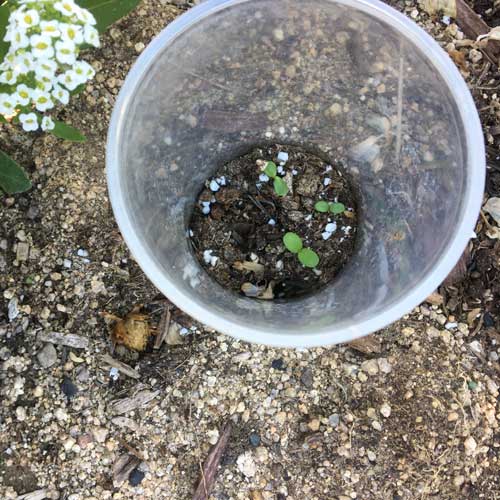
My spring garden looks like I am growing plastic cups and skewers!

0 Comments