Bed Preparation and Planting
Finally the time has come to put in the finishing touches to your garden area. You have selected your plants and have determined where they are to be placed. New soil has been brought in and spread to the height that you wish your bed to be.
If you have installed an automatic irrigation system your heads are in place and have been tested for coverage.
Soil Preparation
Compost! Compost! Compost!
Compost is a must. It is rich in the nutrients your plants need and helps soil retain its moisture. Put a good thick layer on top of your new soil and mix it well with a fork or rake.

Planting
Even though you may have drawn out your plan it helps to visualize what it will look like by setting your plants in their intended location. Make sure you allow enough room between them. Most nursery perennials have suggested spacing – although to be honest I usually put them a little closer together than suggested. Once you are happy with the placement it is time to dig in.
- Dig a hole a few inches wider and deeper than the plant. If your garden beds are new this might be more difficult than it sounds. You may need to dig as deeply as you can, add water and let it soak in. Dig again and repeat until your hole is large and deep enough.
- Add water and let it soak in
- Add a few handfuls of compost. Be generous! It is cheap and your plant will thank you.
- Add more water
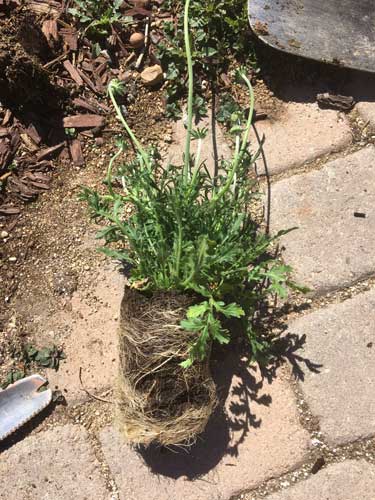
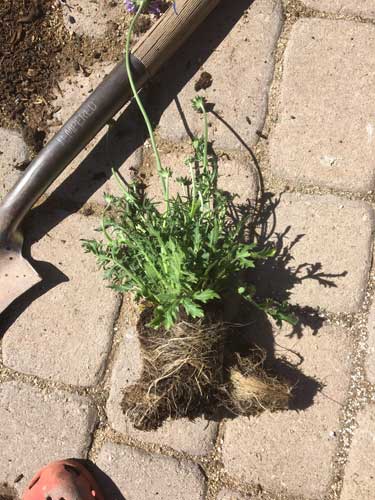
- Remove the plant from the pot. Often this too is not as easy as it sounds. Many plants are root bound and do not want to come out of their pots. Cut off any roots that are protruding from the bottom of the pot. Lay the pot on its side and gently push on it, rolling it back and forth and pushing until it is loose. Always hold the plant at the base of the foliage, tip the pot and allow the plant to slide out into your hand. If it is resistant roll and push some more.
- Take a look at the roots of the plant. If they are massed or wound together your plant will never take. Loosen and spread the roots by gently working your finger into the bottom and spreading the roots until they fan out.
- Make sure you plant at the right depth. The top of your soil should be the same level it was in the nursery pot. Fill the hole to the proper height for your plant with a mixture of soil and compost. Sometimes you can’t dig deeply enough into your bed. If that is because you have hit rock you can spread the roots and they will grow around it. If it is because the soil is too hard – water, amend with compost, water – or find a new spot.
- Fill around your plant blending old soil and compost. Make sure your plant is properly seated in the hole.
- Water
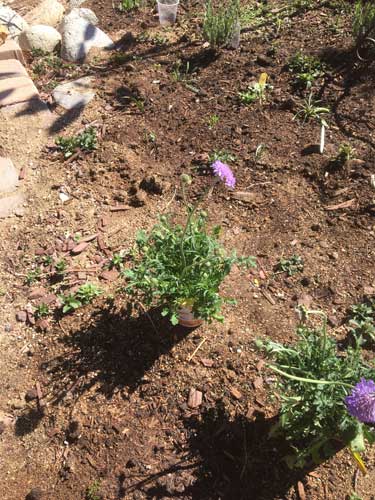
I like to leave the nursery plant tags stuck into the ground by the plant until it is well established. This helps me see at a glance what is new and sometimes even remember what the heck I put in!
If you are keeping a garden journal add your entry.
A Word About Timing
It is always best to add plants to your garden in the early spring before the weather heats up or in the fall when the days cool. Unfortunately this is not always possible. If you have reached this point in building your garden and it is mid summer – what to do?
The best time of day to plant during the hot months is in the evening hours. This will minimize weather-related stress and transpiration loss from the foliage and allow your plants the cooler night time hours to settle in.
Make sure to add a layer of mulch and check on the newly planted daily. They may need a little extra water for a few days – but don’t overdo it!
Fall planting is ideal as fall is generally much less labor intensify than spring and here in the high desert we have a long period before frost is an issue. In addition, waiting until the weather cools has the advantage that your summer garden is still firmly in mind and mostly in place to make tweaks.
Make sure to allow plenty of time for plants to establish themselves before the first hard frost date -8 to 10 weeks is recommended. Here in the high desert that is usually toward the end of November and into December. Some years it has not been until January or even February!
And although the weather has cooled, don’t forget to water.
Give Them a Little Help
Ironite
I used to use Ironite as a soil amendment to lower the PH in my gardens. High desert soil is more alkaline than acidic. Most plants thrive in slightly acidic soil because that pH affords them good access to all nutrients.
Unfortunately along with quality control issues and changes in formulation, Ironite has been shown to contain high levels of arsenic and lead.
I am researching alternatives and will keep you updated. I’d love for you to weigh in on this in the comments!
Fertilizer
Fertilizing can be a bit tricky in the high desert garden. There are many drought tolerant perennials for our type of garden that not only do not care about fertilizer but actually will not tolerate it. It is not a good idea to apply fertilizer on new plants as it can burn the roots. Leave any application until the following spring.
Final Touches
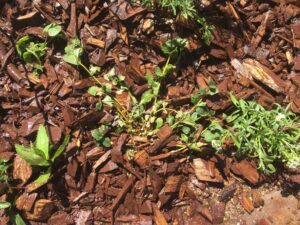 Spread mulch a couple of inches thick over the area you have planted bringing it up to the base of each plant.
Don’t forget the garden art! Invariably there are small areas that need just a little something to draw the eye. Garden art is not only fun to collect and create it adds a spark of your personality to the wonder you have created.
Stand back, say “I Rock!” and take in all that you have accomplished!!
0 Comments